Wednesday, December 31, 2014

Elf Academy

Every season, my library has hosted some sort of holiday program. For the past few years, we've done a Polar Express program. This year, I decided to try to switch things up and host an Elf Academy. The basic idea is that the kids would complete various elf-themed crafts in order to become Santa's official elves. It was a huge hit! Here's the rundown:

Ages: We opened the program to all ages.

Days/Times: We offered 3 different sessions on consecutive evenings at 7:00 p.m. The program lasted about an hour.

Staff Needed: Me plus another staff member. I also had 2 teen volunteers each night.

Program Outline:

As the families arrived, I had them complete 4 different "Elf Activities". This took about 30 minutes for the majority of the kids to finish all of the crafts.

Elf Activity #1: Elf Hats


You Need:

  • Red poster board headbands
  • Green construction paper triangle "hats"
  • Elf ears (cut out from manila file folders)
  • Pom poms
  • Markers
  • Glue sticks
  • Staplers

All the kids do for this is glue the pom pom to the triangle, the triangle to the headband, and then staple the band to fit the child's head. I let the kids decorate their hats with the markers. I asked them to put their name on the front of the band (so that Santa would know their name).

Elf Activity #2: Reindeer Food

You Need:
  • Rolled oats
  • Birdseed
  • Decorator crystal sprinkles
  • Sandwich baggies
  • The reindeer poem printed on cardstock

Each child takes a baggie and adds a scoop of each ingredient. Place a copy of the poem in the bag at the end and close it up. Easy peasy!

Elf Activity #3: Ornament Creation

I just purchased ornament kits from Oriental Trading. I went with scratch art ornaments this year.


Elf Activity #4: Jingle Bell Bracelets

You Need:
  • Pipe cleaners
  • Jingle bells

Each child took 3 bells and strung them on the pipe cleaner. Then they wrapped it around their wrist and tucked in the ends.


As the kids finished the activities, I had them gather on the other half of the room on the floor, where I read a story. I chose Shhh! by Julie Sykes, which is one of my favorite Santa stories. It's interactive in that you can have the kids say "Shhh" at the right times in the story.


After that, my staff partner sang a fun song with the kids using their bells. 

Ring the Jingle Bells
(Tune: She'll Be Comin' Round the Mountain)

We will ring those jingle bells so loud and clear
We will hear the dingle, dingle
When they jingle, jingle, jingle
We will ring those jingle bells so loud and clear


We will ring those jingle bells so quietly
We will hear the dingle, dingle
When they jingle, jingle, jingle
We will ring those jingle bells quietly

We will ring those jingle bells so fast and loud
We will hear the dingle, dingle
When they jingle, jingle, jingle
We will ring those jingle bells so fast and loud

Then, one of us said something to the effect of "You know...I wonder if something magical will happen if we all shake our bells at the same time together." That ended up being Santa's cue to come out!

We have a fabulous volunteer who dresses up as Santa for us every year. We set out an armchair for him in the corner of the room to sit in while he talks with the kids.

After Santa's comes out, I announce that I'll be splitting the group in half according to last name. Half of the group will visit with Santa and half will decorate sugar cookies and have some hot cocoa. Then they'll switch over to the other group as they finish. Hopefully, this way the kids/parents won't get restless waiting for Santa.

Group #1: Santa
Santa sits in the armchair and greets each child. They can visit for a moment and tell him what they want for Christmas. The parents can take photos and Santa hands off a diploma and mini candy cane to each child for finishing Elf School. My coworker had a clipboard with the certificates and wrote each child's first name in marker as they visited Santa.


Group #2: Cookies and Hot Cocoa

While I read Shhh!, I had the teen volunteers clear off 2 of the craft stations and set up the icing and sprinkles. Before the program began, we had set each sugar cookie on a paper plate and had them on our kitchen counter. This way, kids could take a cookie and then go over to the tables to decorate them. We also had big carafes of hot cocoa. I had 4 carafes each night, which was a good amount for the 100+ people I had at the program.


What I Learned:


  • Originally, I allowed a maximum of 50 children for each session. Because it was so popular, I opened it up to 60 total instead. This ended up being too many people, even though we held the program in our large meeting room. Next year, I would stand firm on 50 and maybe open a 4th session instead.


  • I purchased red and green icing and sprinkles because I was thinking it would be festive, but I had some comments about concerns with the dye in the icing. So next year, I would probably also offer plain white icing.

You can click here to see more photos of the program on our library department's Facebook page!

Tuesday, December 30, 2014

Teen Jewelry Making

After hosting several technology programs recently at my library, I was really itching to do sort of a "back-to-basics" hands-on craft program for teens. A few years ago my mother and I had taking a jewelry making class at our local craft store, so I thought I would see if I could teach others how to do it!

The thing with jewelry making is that there are a ton of different types of it out there, from leather to wire work to crochet. I decided to stick to something less complicated, which was beading.


First, I pulled a bunch of beading books from my library's shelves to refresh my memory. Here are the ones I found to be the most helpful:


Fun and Simply Beads by Tair Parnes
The Girls' World Book of Jewelry by Rain Newcomb
Teach Yourself Visually Jewelry Making & Beading by Chris Franchetti Michaels
The Impatient Beader Gets Inspired! by Margot Potter


Next, I figured out a shopping list of the materials/findings I needed. Here's what I ended up using:


  • Craft felt sheets (it acted as a bead board and allowed the teens to lay out their designs without their beads rolling around)
  • Round nose pliers/Flat nose pliers/Wire cutters (I found these in a fairly cheap set from Amazon. You could also ask co-workers to lend you theirs.)
  • Bowls (to carry their beads in)


  • Beads (I just purchased bulk seed and glass bead sets from my local craft store. You could ask co-workers to clean out their craft drawers at home and donate them too.)
  • Beading wire (You can purchase various "strands" of wire, which gets more expensive the finer/higher number of strands it is. 7 strand worked just fine for us and it's cheaper.)


  • Crimp tubes
  • Jump rings
  • Lobster clasps
  • Earring hooks
  • Head pins
  • Eye pins


Then I worked on my format for the class:

Outline:
  • Introductions
  • How to design/think about jewelry design
    • Use a felt sheet to plan out your design before stringing so you don't have to start over
    • Color theory
    • Patterns - Is there a pattern to your design? Alternating small and large, alternating colors, etc...
  • Tools/materials overview
    • Pliers/wire cutters
    • Bead wire
    • Beads - seed beads, glass beads
    • Findings
  • How to open a jump ring correctly
  • Bracelets
    • How to attach a crimp tube
  • Earrings
    • How to turn a head pin

After I went over everything with the teens, I let them come up and choose their beads/findings (this is where the bowls came in handy!) I originally told them they could make 1 set of earrings and 1 bracelet, but I ended up allowing them to make more if they had time. I also gave them a handout with a hodgepodge of pages from various jewelry books with more tutorials on the concepts, such as attaching the crimp tube, as well as glossaries of the tools they were using. This is where the books mentioned above came in extra handy.

How It Went:

Overall, I would call it a success! I had a slightly low turnout due to prior school activities, but the number of teens who attended ended up being good as I was the only staff member in the room. If you do this program and end up with a lot of sign-ups, I would recommend having some extra adult help in the room as inevitably the teens will have questions and need assistance completing their jewelry creations. 

Also, I had planned on 1.5 hours for the program, but I could have used more! The teens got really into their designs and some were unable to finish before the end, so I gave them plastic baggies to take their beads/findings and finish at home. I would recommend around 2 hours for this activity.

In craft programs, I like to have music in the background. So I set up some speakers and opened Pandora radio on my phone. When I asked the teens for a good music artist to look up for a station choice, I suggested Katy Perry. One of the teen girls said, "Miss Kim, Katy Perry can be inappropriate!" Taylor Swift was okay, but ended up going too country for them. FYI: The perfect Pandora station for my teens ended up being Demi Lovato.

Monday, December 15, 2014

Pizza and Pages: Jeremy Fink and the Meaning of Life by Wendy Mass

Type of Book: Realistic

Plot Summary: Just before Jeremy Fink's 13th birthday he receives a mysterious box from his deceased father along with a letter. The letter states that the box contains none other than the meaning of life. One problem though...there aren't any keys! In this sometimes humorous, sometimes touching tale Jeremy along with his best friend, Lizzy go on the hunt to locate the keys to this mysterious box...and hopefully learn the meaning of life.

Average Teen Rating: 7.4
I wasn't sure how my teens would react to this book since most of them are die-hard sci-fi and fantasy fans, but for the most part they loved it! They especially liked Wendy Mass's writing style and touches of humor throughout. I highly recommend this one for middle school book groups.

Discussion Questions:

The majority of my questions came from here.

1. Throughout the book, Jeremy and Lizzy end up delivering 3 different items back to their owners (the book, the lamp, and the telescope). What lesson did they learn about life from each? Did one resonate with you more than another?

2. Jeremy dubs the hour between 11pm and midnight the "Hour of Jeremy". Do you have time set aside daily like Jeremy? If so, when is it and what do you do during that time period?

3. Let's go back to the scene where Lizzy and Jeremy miss their bus stop, but because of that, Lizzy finds another rare card to add to her deck. Was that fate or coincidence? Do you believe in either?

4. What do you think about Lizzy as a character? How would you describe her? Same with Jeremy. Do you relate to one more than the other?

5. Were you surprised to learn that Jeremy's dad planned everything that happened in the story? Did you guess it beforehand? If so, when did you know?

6. What is the meaning of life to you? Why are we here?

Saturday, November 29, 2014

LEGO Mindstorms on the ALSC Blog

I'm over at the ALSC Blog today talking about my LEGO Mindstorms program adventure. Check it out!

Monday, November 24, 2014

Storytime - Counting


Books:


Ten Terrible Dinosaurs by Paul Stickland - This counting story about dinosaurs went over okay with my group. I don't know that I'd use it again.


Pete the Cat and His Four Groovy Buttons by Eric Litwin - You can't go wrong EVER with Pete the Cat! I did this one as a flannel story and had the kids sing his button song along with me.


Source for Flannel


Songs/Rhymes:

Five Funny Dinosaurs (w/ flannel)

(Tune: Five Green and Speckled Frogs)

Five funny dinosaurs (hold up five fingers)
Let out a great big ROAR! (Roar)
And ate up some most delicious leaves, YUM YUM (rub tummy)
One jumped into the pool (hold up one finger and "jump" through other arm)
Where it was nice and cool
Now there are four funny dinosaurs (hold up four fingers)
ROAR ROAR! (Roar)

Continue with 4, 3, 2, and 1

Zoom Zoom Zoom

Zoom zoom zoom, we're going to the moon (clap or swish hands)
Zoom zoom zoom, we're going to the moon
If you want to take a trip, climb aboard my rocketship
Zoom zoom zoom, we're going to the moon
In 5, 4, 3, 2, 1... (count down on fingers and slowly crouch lower)
BLAST OFF! (jump up in the air)

(Thanks to Jbrary for this awesome song! This one is so popular with my babies and toddlers, I usually have to do it more than once.)


Storytime - Thanksgiving

Books:

All for Pie Pie for All by David Martin - This is a cute story about a grandma cat who makes a pie for Thanksgiving. Everyone in the cat family eats a piece until there's one piece left. Then the Mouse family comes along and eats all but one crumb. Then the Ant family comes along...and you can guess what happens. It's a cute story that's perfect for sharing with either toddlers or preschoolers!

Thanks for Thanksgiving by Julie Markes - This is a sweet, short story about all sorts of things to be thankful for in life. I prefaced the story by teaching the kids the sign for "Thank You" and made the book interactive by asking them to sign and say "thank you" with me on each page.


Songs/Rhymes:

Chicken in the Barnyard

Chicken in the barnyard staying out of trouble (draw a circle on your child's palm)
Along came a turkey and... (walk fingers up child's arm)
Gobble gobble gobble! (tickle all over)

If You're Thankful and You Know It...
(Tune: If You're Happy and You Know It)

If you're thankful and you know it, clap your hands
If you're thankful and you know it, then your face will surely show it
If you're thankful and you know it, clap your hands

...Stomp your feet
...Say, "I am!"
...Do all three
Source

Storytime - Owls

Books:


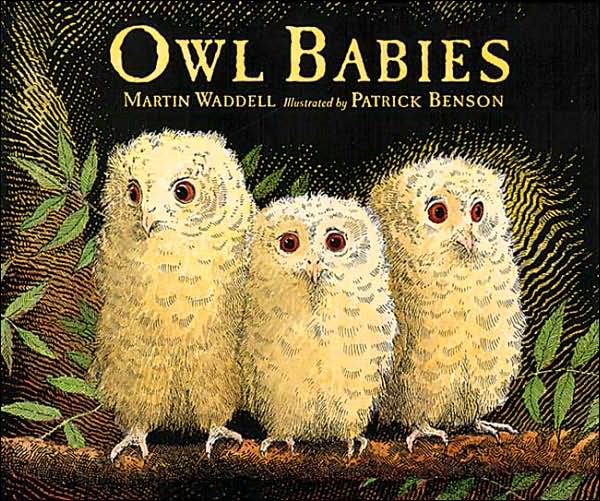
Owl Babies by Martin Waddell - I did this story as a flannel, which you can see more on here.


Wow! Said the Owl by Tim Hopgood - This is a great book all about colors.


Songs/Rhymes:

Five Hoot Owls (w/ flannel)

Five hoot owls sitting in a tree
One flew away
How many do you see?
1, 2, 3, 4

Continue with 4, 3, 2, and 1
Source

If You Want to Be an Owl
(Tune: If You're Happy and You Know It)

If you want to be an owl, say "Who who!"
Then you get to sleep all day
And at night you get to play
If you want to be an owl, say "Who who!"

...If you want to be an owl, flap your wings
...If you want to be an owl, blink your eyes
Source


Thursday, November 13, 2014

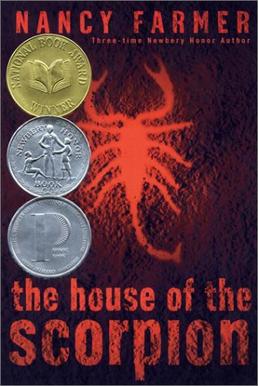
Pizza and Pages: The House of the Scorpion by Nancy Farmer

Type of Book: Sci-Fi

Plot Summary:
From Goodreads: "Matteo Alacran was not born; he was harvested with the DNA from El Patron, lord of a country called Opium. Can a boy who was bred to guarantee another’s survival find his own purpose in life? And can he ever be free?"

Average Teen Rating: 6.07
I was actually pretty shocked at how polarizing this book was! About half of my teens loved it and rated it at a 10. The rest complained that it was too slow at the beginning or too depressing and gave it low marks.


Discussion Questions:

I found discussion questions from the Multnomah County Library website and from Miss Giggles.

1. Why do you think the decision was made not to blunt Matt's intelligence? Do you think his life was easier or more difficult because of this?

2. Is a clone still human, or something else?

3. Is someone's personality formed more from their genetics or their upbringing (nature vs. nurture)?

4. Did you realize right away that this was set in the future or did you think it was in the past/present? How far into the future do you think it is?

5. What do you think happened in the story's world between now and then to make the world the way it is?

6. Do you think this could happen to us?

7. Would you clone yourself? What would you use your clone for?

8. If you lives in Matt's world, would you clone yourself to live longer or be more like El Viejo?

9. Do you think Celia's solution of poisoning Matt so that he couldn't be an organ donor to El Patron was a good one? Was there a better way?

10. Will you read the sequel?

Anime Club: Sushi Rolling

This month for our anime club meeting, I wanted to try sushi making. It was quite the learning experience, but for the most part, things went pretty smoothly.

First, I researched sushi rice recipes as this is the basis for a good sushi roll. The recipe I went with is this one. It's super easy to make. I made a small trial batch in a saucepan on the stove, but then I purchased a rice cooker to make a big batch for the meeting. Whichever one you are comfortable with will work. (Note: I had about 20 teens at my meeting so I use 10 cups of dry rice thinking that would be a good amount...WRONG...I made waayyyyy  too much! Next time, I would probably only make around 6 or 7 cups of dry rice.)

I found the sushi rice, nori, and rice vinegar at my local Asian market. To make basic sushi, you need:

  • Sushi rice
  • Nori sheets
  • Carrot slices (I found bags of matchstick carrots at the grocery store that we the perfect shape/size. But you could also buy whole carrots and julienne them yourself.)
  • Cucumber slices (I had a slicer/julienne mandoline that made cutting them up super easy and quick. But again, you could do this by hand with a knife.)
  • Cream cheese
  • Imitation crab meat
  • Soy sauce
  • Wasabi


I also provided the following:

  • Wax paper (In lieu of spending a fortune on sushi rolling mats for 20 teens, wax paper works just as well!)
  • Chopsticks
  • Small cups - for soy sauce dipping (purchased at my local party store in bulk, but I've also seen them at Target.)
  • Plastic spoons - for spreading rice
  • Serrated knives - for making sushi slices
  • Small plastic cups of water - This helps when you are trying to close your nori roll. If you wet your finger, it helps seal the nori closed.

Directions:

1. I had the teens come up to the counter and load up a paper plate with their ingredients. Then they took their stuff back to the tables. 

2. Lay out your nori sheet on the wax paper.

3. Spread a thin layer of rice onto the nori. Be careful not to lay it on too thickly or you'll end up with a sushi burrito!

4. Add your preferred ingredients on top of the rice (carrots, cream cheese, crab, etc.).

5. Use the wax paper to help you roll your sushi. Make sure you don't end up with the wax paper inside your roll!

6. Wet you finger to seal the nori roll completely. The warm rice should also help with this.

7. Let your sushi cool down for a few seconds before slicing to make it easier.

8. Carefully use a serrated knife to cut the sushi into slices.

9. Dip sushi into soy sauce or wasabi and enjoy!

This activity took a lot of prep ahead of time, but in the end it was worth it. The teens had a blast making (several) rolls of sushi and watching some anime.

Have you ever made sushi with teens? What ingredients did you use?

Tuesday, October 28, 2014

Flannel Friday: Owl Babies by Martin Waddell

Fall is the perfect time for an owl-themed storytime. For me, that means busting out one of my perennial storytime favorites, Owl Babies by Martin Waddell. But I wanted to go beyond reading the book this time, so I decided to try and make a flannel out of it. Here's how it turned out:

Not too bad, right?

First, I made the Sarah, Bill, and Percy owl. To do that, I created a template that you can find here.


Then I cut out the shapes in white felt and made the beaks and feet out of tan felt. Here's an owl put together:


I also knew that I wanted the owls to be fluffy just like the book illustrations, so I took cotton balls, pulled them apart, and then glued it down on top of the felt. Then I glued on the googly eyes and beak. Lastly, I took a q-tip with some black acrylic paint and lightly went over the cotton to create a feather pattern. For Sarah, I had some leftover false eyelashes from my wedding day that I just trimmed down and glued on. Needless to say, this is optional!

Percy and Sarah
Bill


For the tree, I just free-hand cut out the trunk, branches, and leaves. Then I used the black acrylic paint again to create texture.

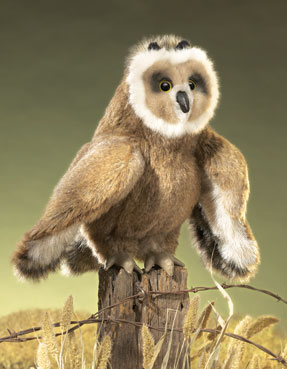
For the Mommy Owl, I use one of our Folkmanis Owl Puppets


I hide her somewhere by my chair and at the part of the story where she's supposed to appear, I have the children close their eyes and wish for her to come home just like Sarah, Percy, and Bill do in the story. Then I bring Mommy Owl out and have the kids open their eyes!

Lisa at Libraryland is hosting this week's Flannel Friday. You can find the round-up over on her blog! For more information on Flannel Friday, check out their websiteFacebook group, or Pinterest page.

Wednesday, October 15, 2014

Anime Club: Cat Ear Headbands

For our October Anime Club meeting, I wanted to keep our activities sort of Halloween-y. So we put on some Ghost Hunt and I showed the teens how to make cat ear headbands. Some also came in their favorite cosplay so I awarded the top 2 with boxes of Pocky. I found a good tutorial for headbands here.

Here's what you need:

  • Craft felt (in lots of different colors - glitter felt is a bonus!)
  • Aleene's Tacky Glue
  • Scissors
  • Straight pins
  • Headbands (I buy them in bulk from Amazon)
  • Ribbon* 
  • Bells*
  • Lace*
  • Thread*
  • Sewing needles*
* = optional


I also made a cat ear template that I found here and modified. I cut out several copies onto yellow cardstock.


The teens came up with some pretty neat designs! Here's my not-as-great example:


I also set out some Asian candy for them to try. We had everything from Hi-Chews to scorched rice candy. Surprisingly, some of them liked the scorched rice! I also had lemonade and cookies so they wouldn't go hungry if they didn't want the candy. 


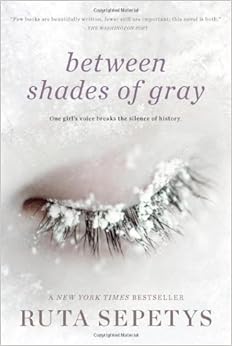
Pizza and Pages: Between Shades of Gray by Ruta Septys

Type of Book: Historical Fiction

Plot Summary:
On one June night in 1941, 15 year-old Lina's life is changed forever. Soviet NKVD officers ransack her home and force Lina and her family into a train car bound for Siberia. Along with many other Lithuanian families, Lina's must learn to survive in prison camps under the harshest of conditions. This is based on true events that occurred during Stalin's reign of terror.

Average Teen Rating: 7.2
My teens loved this one. A lot of them found it to be "depressing" but "very well-written". This book generated a lot of good discussion. I highly recommend it!


Discussion Questions:

1. A lot of people are aware of the Holocaust, but not as many are aware of the mass deportations in 1941. Were you? If so, did the book teach you anything new? If not, were you surprised to learn about it?

2. Have you read other novels that dealt with mass killing before, such as the Holocaust? How did it compare with this one?

3. When the NKVD comes to take Lina and her family away, her mother miraculously remains calm. Do you think this helped the rest of the family?

4. When Jonas observes his mother smashing all of the crystal as asks why, she replies that it's because she loves them so much. Is this a rebellion? Is her reaction appropriate or strange?

5. Do you think the author was good at describing the conditions that Lina and her family lived in (the train, the camp, etc.)? How did it make you feel?

6. Do you think you would have survived?

7. The Bald Man isn't painted as a very sympathetic character throughout most of the novel. What do you think his purpose in the story was?

8. Why do you think Lina, Jonas, and Andreas ultimately survived? What character traits did they have that helped them? Who did you relate to the most?

9. Do you think the people that signed the documents that charged them with counterrevolutionary activities against the Soviet Union were wrong? Weak? Could you see yourself or your family doing the same?

10. Lina's outlet for dealing with her situation is drawing. Do you have a similar outlet? If so, what is it?

11. What was your reaction to finding out that Lina's extended family was safe in Germany at the cost of Lina's family's freedom? Do you think Lina was justified in her reaction?

12. What are the "shades of gray" in the story?

I borrowed/tweaked some of the discussion questions from here.

Thursday, October 9, 2014

Storytime - Mice

Books:

Little Mouse and the Big Cupcake by Thomas Taylor - This is a fun story about a mouse who has a cupcake that's too big for him to carry home. So he enlisted the help of his animal friends! I make this one interactive by having the kids rub their tummies and saying, "Yum yum YUMMY!" on the pages where the animals take a bite of the cupcake. This one also makes a great flannel story.


Mouse Mess by Linnea Riley - This is a cute story about a mouse who wakes up after everyone else goes to bed and decides that he needs a snack. But he makes a big mess in the process! It's short, which is great for toddler attention spans and has a nice reading cadence.


Other Books to Use:
Lunch by Denise Fleming
If You Give a Mouse a Cookie by Laura Joffe Numeroff
Seven Little Mice Go to School by Haruo Yamashita
Mouse Paint by Ellen Stoll Walsh
Alphabet Under Construction by Denise Fleming
Hide and Squeak by Heather Frederick
The Little Mouse, the Red Ripe Strawberry, and the Big Hungry Bear by Audrey Wood

Rhymes/Songs:

Hickory Dickory Dock

Hickory dickory dock (rock side to side)
The mouse rain up the clock (tickle up one arm)
The clock struck one (clap once)
The mouse ran down (tickle down other arm)
Hickory dickory dock! (rock side to side)

...The clock struck two (clap twice), The mouse said, "Peek-a-boo!" (play peek-a-boo)
...The clock struck three (clap three times), The mouse said, "Whee!" (wave hands in the air)
...The clock struck four (clap four times), There is no more (shrug shoulders and hold out hands)

If You're a Mouse and You Know It...

(Tune: If You're Happy and You Know It...)

If you're a mouse and you know it, clap your paws (clap hands)
If you're a mouse and you know it, then your face will really show it
If you're a mouse and you know it, clap your paws (clap hands)

...eat some cheese
...shake your tail
...give a squeak

ShareThis