Saturday, September 28, 2013
Superhero Training Academy on the ALSC Blog
Today I'm over on the ALSC Blog talking about the Superhero Training Academy I did for grades K to 5 this past summer. Check it out!
Thursday, September 26, 2013
Toddler Storytime - Fall
The Plan:
Books:

Books:
The Leaves on the Trees by Thom Wiley
Flannel Story: Fall is Not Easy by Marty Kelley
This story lends itself very well to a flannel story. Here's my version:
 |
| Please pardon the awfulness of my camera phone. |
(Thanks to Mel's Desk and Storytime Katie for the inspiration!)
Songs/Rhymes:
"Counting Leaves"
1 leaf, 2 leaves, 3 leaves today (count on fingers)
4 leaves, 5 leaves
Woosh! (blow on fingers)
Blow them all away! (flutter fingers away)
"Leaves Are Falling Down"
(I passed out scarves for this one and we pretended that they were leaves. You could also just use your hands.)
Leaves are falling down (flutter scarves down to floor)
Hush. (say it softly and touch the floor)
Leaves are falling down (flutter scarves down to floor)
Hush. (say it softly and touch the floor)
Whisper, whisper, whisper, whisper. (sway scarves side to side)
Leaves are falling down (flutter scarves down to floor)
Hush. (say it softly and touch the floor)
Monday, September 23, 2013
Toddler Storytime - Cats
To kick off our fall storytime session, I decided to start with cats. Because why not?
The Plan:
Books:


If You Give a Cat a Cupcake by Laura Numeroff
Where is Tippy Toes? by Betsy Lewin
Flannel:
"Rainbow Kittens"
Six little kittens found a box of paint.
They jumped right in...
Their mother will faint!
The first little kitten came out red.
"I'll be orange!" the second one said.
The third little kitten turned bright yellow.
"I'll be green," said the next little fellow.
The fifth kitten said, "My favorite is blue."
"Purple for me," said the sixth with a mew.
Dancing home the little kittens go,
To show their mother a kitten rainbow!
Mama cat said, "You're the most colorful kittens that I've ever seen!"
Then one...by one...by one...by one...by one...by one...
She licked them all clean!


(Thanks to Sarah at Read Rabbit Read for this flannel idea!)
Songs/Rhymes:
"If You're a Kitten and You Know It"
If you're a kitty and you know it lick your paws. (pretend to lick paws)
If you're a kitty and you know it lick your paws.
If you're a kitty and you know it then your face will surely show it.
If you're a kitty and you know it lick your paws.
Continue with:
...show your claws (show claws)
...swish your tail (wiggle bottom)
...say "Meow!"
This session I also wanted to try something new: the storytime cube. I know it isn't a new idea, but while perusing my Feedly of storytime blogs, I came across posts from Mel at Mel's Desk and Amy at The Show Me Librarian. I thought it might be a fun way to integrate the element of suspense for the toddler and save my sanity by doing something different each week. Here's what mine looks like:

I bought the cube itself from Discount School Supply and then just made my own song inserts on Publisher that were printed on cardstock.
The Plan:
Books:
If You Give a Cat a Cupcake by Laura Numeroff
Where is Tippy Toes? by Betsy Lewin
Flannel:
"Rainbow Kittens"
Six little kittens found a box of paint.
They jumped right in...
Their mother will faint!
The first little kitten came out red.
"I'll be orange!" the second one said.
The third little kitten turned bright yellow.
"I'll be green," said the next little fellow.
The fifth kitten said, "My favorite is blue."
"Purple for me," said the sixth with a mew.
Dancing home the little kittens go,
To show their mother a kitten rainbow!
Mama cat said, "You're the most colorful kittens that I've ever seen!"
Then one...by one...by one...by one...by one...by one...
She licked them all clean!
(Thanks to Sarah at Read Rabbit Read for this flannel idea!)
Songs/Rhymes:
"If You're a Kitten and You Know It"
If you're a kitty and you know it lick your paws. (pretend to lick paws)
If you're a kitty and you know it lick your paws.
If you're a kitty and you know it then your face will surely show it.
If you're a kitty and you know it lick your paws.
Continue with:
...show your claws (show claws)
...swish your tail (wiggle bottom)
...say "Meow!"
This session I also wanted to try something new: the storytime cube. I know it isn't a new idea, but while perusing my Feedly of storytime blogs, I came across posts from Mel at Mel's Desk and Amy at The Show Me Librarian. I thought it might be a fun way to integrate the element of suspense for the toddler and save my sanity by doing something different each week. Here's what mine looks like:
I bought the cube itself from Discount School Supply and then just made my own song inserts on Publisher that were printed on cardstock.
Tuesday, September 17, 2013
Lapsit Storytime
At my library, we offer a Baby Storytime for ages 6 months to 23 months old. However, we also offer a Lapsit Storytime for newborns up to 10 months old. I like this idea a lot because it allows me to focus more specifically on lap rhymes and songs as well as helping parents bond with their child so early on.
Here's my outline for this first week (The headings in green are things that I do every week):
Before Parents/Babies Arrive:
- I set a quilt down in the middle of the room. This is what the parents/babies sit around during storytime and I sit on the floor with them.
- I place a handful of board books and 3 to 4 puppets in the middle of the quilt for the babies to look at/touch during storytime if they like.
- I put on some Baby Mozart in the background as they arrive and settle in.
Greeting: "Hello Babies" (tune: Goodnight Ladies)
Hello babies,
Hello babies
Hello babies,
Hello, hello, hello!
Then I go around the quilt to each baby with my demonstration doll (a teddy bear) and sing the song again, this time inserting their name:
Hello ______,
Hello ______,
Hello ______,
Hello, hello, hello!
Opening Song: "The More We Get Together" (with baby sign language)
I teach this song using the signs for "more", "together", "happy", and "friend"
Together, together
The more we get together
The happier we'll be!
'Cause your friends are my friends
And my friends are your friends
The more we get together
The happier we'll be!
Clapping Nursery Rhyme: "Pat-A-Cake"
I like to do a nursery rhyme or other familiar short rhyme where we just clap along with saying it. I think this helps babies develop clapping skills and gives them an introduction to rhythm. Plus, it's nice to do rhymes/songs that parents are most likely familiar with and will feel comfortable chanting along with me.
Book: Snappy Little Farmyard by Dugald Steer
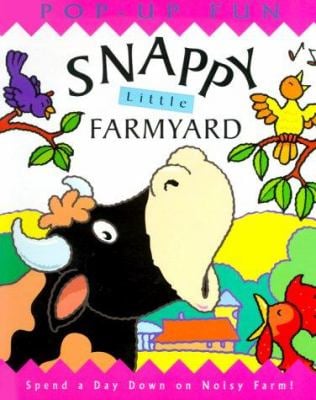
I try to do a really short book, preferably a pop-up or lift-the-flap to engage the babies.
Rocking Rhyme: "Tick-Tock"
Tick-tock, tick-tock (rock baby)
I'm a little cuckoo clock
Tick-tock, tick-tock
Now I'm striking one o'clock...Cuckoo! (lift baby once on "cuckoo!")
Repeat with two o'clock (lift twice) and three o'clock (lift 3 times)
Book: Snappy Little Farmyard by Dugald Steer
I try to do a really short book, preferably a pop-up or lift-the-flap to engage the babies.
Rocking Rhyme: "Tick-Tock"
Tick-tock, tick-tock (rock baby)
I'm a little cuckoo clock
Tick-tock, tick-tock
Now I'm striking one o'clock...Cuckoo! (lift baby once on "cuckoo!")
Repeat with two o'clock (lift twice) and three o'clock (lift 3 times)
Tickle/Touch Rhyme or Song: "Itsy-Bitsy Spider"
I like to give parents a couple of different options for the motions with each rhyme because every baby/parent is different.
The itsy-bitsy spider (tickle fingers up baby's tummy or do the motions with hands for baby)
Went up the water spout
Down came the rain and (tickle fingers down baby or flutter fingers down)
Washed the spider out
Out came the sun and (rub baby's belly in a circle or hold hands above head for sun)
The itsy-bitsy spider (tickle fingers up baby's tummy or do the motions with hands)
Went up the spout again!
Bounce/Action Rhyme or Song: "Way Up High in the Apple Tree"
Way up high in the apple tree (raise arms or baby above head)
Two little apples I did see (make or point to 2 fists)
I shook that tree as hard as I could (jiggle baby)
And d-o-w-n came the apples (lower arms or baby)
Mmmm they were good! (rub tummy)
Tickle/Touch Rhyme or Song: "Where is Thumbkin?"
Where is thumbkin?
Where is thumbkin?
Here I am! Here I am! (bring out thumb or touch babys' thumbs)
How are you today, sir? (wiggle thumbs)
Very well, I thank you.
Run away. Run away. (hide thumbs behind back)
Repeat with pointer, tall man, ring man, pinkie, and whole family.
Bounce/Action Rhyme or Song: "Clap Your Hands" (tune: Row Row Row Your Boat)
Clap, clap, clap your hands
Clap them now with me
Do it now, let me see
Clap your hands with me
Repeat with roll your hands, shake your legs, tap your feet.
Goodbye Song: "Skinnamarink"
I tell parents that they can do this song any way you like. For the tune and an example of movement, see the video below:
Sunday, September 15, 2013
Otakus Unite!: On Planning and Running My Anime Club

1. Talk to your teens: I know this one is probably obvious, but your anime club isn't about you, it's about the teens. Find out what they would like to do, what anime they would like to watch. Let them vote on things and give them a voice. But always be the guiding hand that has the final say. I learned the hard way that if I give my teens too much choice that they can't decide on anything. But letting them choose the name of your club or design the logo empowers them and gives them a feeling of ownership over the club.
2. You don't have to be an expert at all things anime: Even if you aren't an avid anime fan like I am, you can still host a club for teens. There are a wealth of blogs, presentations, and Pinterest boards out there with ideas that are easily implemented. Here's my anime Pinterest board, for example. I've also learned so much from my teens in the past year, such as what anime and manga title are popular right now.
3. Apply for screen permissions well in advance: Most companies take a few weeks to get back to you so plan early! What I try to do is take one afternoon to request screening permission for several different titles all at once. A helpful guide from Right Stuf on who to contact for permissions can be found here.
You can also purchase the anime license from Movie Licensing USA. It costs about $75 per year.
Another option is to utilize the site http://www.crunchyroll.com/. You can email them and they will usually give you a free premium account to stream the anime they offer. The nice thing about Crunchyroll is that screening permission is included and they offer a lot of the latest anime from Japan.
4. You don't have to over-plan your meetings: I often worried that if I didn't plan every minute of the meetings the teens would get bored. Boy was I mistaken! One month, I decided I wanted to do a stamp art activity. I spent a good amount of time and money prepping: cutting foam containers and cardstock, purchasing supplies, and setting up the room. When the teens arrived I showed them how to do the activity and then put on some anime. They spent so much time chatting and watching the anime that half them forgot to do the craft I worked so hard on! Lesson learned. Most likely your anime club teens will just want to hang out, talk, and watch anime.
 So here's my current meeting schedule: We meet twice a month on Tuesdays from 3:30 p.m. to 5:00 p.m. At the first meeting, we just watch anime and have a snack. I also always set out paper, pencils, and colored pencils for the teens to free draw while watching the anime. For the second meeting, we'll do some sort of activity or craft. Past activities have included:
- Stamp Art (see the link above)
- A mini-cosplay panel
- Drawing workshop
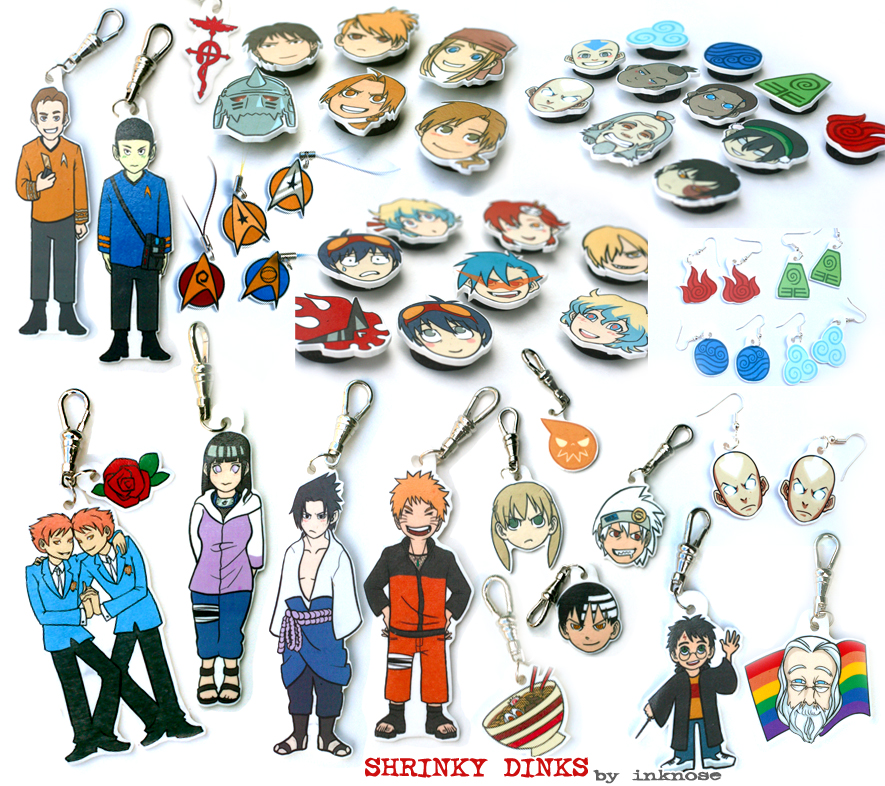
- Shrinky Dink keychains (this one was super easy and popular!)
- Rhythm Heaven Fever gaming on the Wii - This game is really fun and really cheap. It's $11 on Amazon. One caveat: You have to unlock the previous challenge before you can move on, so I sat at home one night with my friend who is an expert gamer and unlocked everything before the program.
- Anime Couples Trivia - Every time a teen answered correctly, I gave them a piece of Hi-Chew candy. I gave out Pocky to the winner which was the person with the most Hi-Chews.
- Kirigami

6. Have fun!: Embrace the learning experiences. It's okay for an activity or craft to fail. Most likely, the teens don't care. They are just happy to gather together and hang out with other teens who are passionate about anime. Any sort of activity is just a bonus. And when all else fails, just throw on the Caramell Dance! (This is a sure-fire way to get your teens all together.)
Do any of you host an anime club for teens? Any tips that I missed? Leave them in the comments!
Tuesday, September 10, 2013
Exploding Elixirs and Magic Mud: Making Some Harry Potter Magic!
A few months ago, my supervisor applied to be a hosting library for the traveling "Harry Potter's World: Renaissance Science, Medicine, and Magic" exhibit from the National Library of Medicine. We receive some large panels that detailed the different historical and scientific aspects found in Harry Potter's world. In conjunction, we were asked to put on a series of programs for grades 3 to 8 that went along with the themes from the exhibit. Being a huge fan of doing science-y programs, I immediately volunteered to do a Potions Class a la Professor Snape.
As the tweens came in, I handed out an Advanced Potions Making booklet. Inside I included the recipes for everything we were making so that they could try everything again at home. You can find a PDF version of it here: http://bit.ly/1a5LezB. For fun, I made up "magical names" for the ingredients and then created a key with the "muggle names" as well.
I knew I wanted to use a stations-based approach to the program. I split the kids up into groups and they rotated every 10-15 minutes to a new table so that everyone would get to do everything. After that, we then all came together to complete the final potion: ice cream in a bag! Here are the stations:
1. Magic Mud: (a.k.a. Gak, Flubber, etc.) - Mix 1 part Liquid Starch to 2 parts white glue (in our case, we did 1/4 cup glue to 2 Tbsp. starch). Mix in 2-3 drops of food coloring and stir until you get the correct consistency. I found that if the mud didn't set up right away, I had them pour it into a sandwich bag and let it set at home.

 2. Burn/Heal Potion: (a.k.a. mini-lava lamps) - This one is super easy and fun. I scavenged plastic water bottles from the recycling bins. Take one and fill it up 2/3 of the way with vegetable oil. Then fill it the rest of the way with water, leaving about an inch at the top. Add some food coloring and watch it mix with the water. Then take an Alka Seltzer tablet (or any off-brand) and break it into 3 or 4 pieces. Drop one in and let it fizz! The lava lamp still works without the Alka-Seltzer, but it's much more fun to see it bubble.
3. Marauder's Messages: (a.k.a. invisible ink) - Admittedly, this one was a little bit of a bust. I've never really had great luck with this activity, but for some reason I keep trying it hoping for success. You take 1 part baking soda and 1 part water (in our case, 1 tsp. of each) and mix it together in a small cup. Then you can use a Q-tip to write your message on plain white paper. Wait for the paper to dry. Then use grape juice concentrate and brush it over the message to reveal it.
The problem with this was that it took way too long to dry and held the other groups up. Next time, I may have them reveal their messages at home or just scrap it altogether.
 4. Felix Felices Potion: This one took me a few tries to get the perfect ingredients. I ended up using glycerin and edible pearl dust. Both I bought from my local craft store. It isn't tasty, but if the tweens drink it, it's completely edible. I then bought some little glass bottles and cording so that they could make necklace and wear their potion. They mixed the glycerin and dust with a toothpick and it looked amazing.

5. Exploding Elixer: I just purchased a can of Kool-Aid fruit punch mix and Pop Rocks. The tweens mixed 1 Tbsp. of Kool-Aid powder with water in an 8 oz. cup then added a mini-pouch of Pop Rocks. It didn't explode or fizz like I wanted it to, but it crackled a lot and sounded cool as they drank it.
6. Honeyduke's Homemade Ice Cream: (a.k.a. ice cream in a bag) - This one is always a hit. You take 1 cup of whole milk, 2 Tbsp. sugar, and 1 tsp. vanilla and put it in a quart-sized freezer bag and seal it with duct tape. Then you put 6 cups of ice and 6 Tbsp. ice cream salt into a gallon-sized freezer bag. Put the quart bag into the gallon bag and seal with duct tape again. Massage and gently shake the bag for 5 to 10 minutes or until ice cream forms. I had the tweens pair up and brought dish towels from home so that their hands didn't get too cold when shaking the bag. Then you can put the ice cream into cups and enjoy!
All in all, the program was a success. I had 30 very excited Harry Potter fans attend. The invisible ink activity did hold up the group and put a kink in the flow of the program, but the tweens didn't notice and got to take home a lot of neat potions at the end.
As the tweens came in, I handed out an Advanced Potions Making booklet. Inside I included the recipes for everything we were making so that they could try everything again at home. You can find a PDF version of it here: http://bit.ly/1a5LezB. For fun, I made up "magical names" for the ingredients and then created a key with the "muggle names" as well.
I knew I wanted to use a stations-based approach to the program. I split the kids up into groups and they rotated every 10-15 minutes to a new table so that everyone would get to do everything. After that, we then all came together to complete the final potion: ice cream in a bag! Here are the stations:
1. Magic Mud: (a.k.a. Gak, Flubber, etc.) - Mix 1 part Liquid Starch to 2 parts white glue (in our case, we did 1/4 cup glue to 2 Tbsp. starch). Mix in 2-3 drops of food coloring and stir until you get the correct consistency. I found that if the mud didn't set up right away, I had them pour it into a sandwich bag and let it set at home.
2. Burn/Heal Potion: (a.k.a. mini-lava lamps) - This one is super easy and fun. I scavenged plastic water bottles from the recycling bins. Take one and fill it up 2/3 of the way with vegetable oil. Then fill it the rest of the way with water, leaving about an inch at the top. Add some food coloring and watch it mix with the water. Then take an Alka Seltzer tablet (or any off-brand) and break it into 3 or 4 pieces. Drop one in and let it fizz! The lava lamp still works without the Alka-Seltzer, but it's much more fun to see it bubble.3. Marauder's Messages: (a.k.a. invisible ink) - Admittedly, this one was a little bit of a bust. I've never really had great luck with this activity, but for some reason I keep trying it hoping for success. You take 1 part baking soda and 1 part water (in our case, 1 tsp. of each) and mix it together in a small cup. Then you can use a Q-tip to write your message on plain white paper. Wait for the paper to dry. Then use grape juice concentrate and brush it over the message to reveal it.
The problem with this was that it took way too long to dry and held the other groups up. Next time, I may have them reveal their messages at home or just scrap it altogether.
4. Felix Felices Potion: This one took me a few tries to get the perfect ingredients. I ended up using glycerin and edible pearl dust. Both I bought from my local craft store. It isn't tasty, but if the tweens drink it, it's completely edible. I then bought some little glass bottles and cording so that they could make necklace and wear their potion. They mixed the glycerin and dust with a toothpick and it looked amazing.5. Exploding Elixer: I just purchased a can of Kool-Aid fruit punch mix and Pop Rocks. The tweens mixed 1 Tbsp. of Kool-Aid powder with water in an 8 oz. cup then added a mini-pouch of Pop Rocks. It didn't explode or fizz like I wanted it to, but it crackled a lot and sounded cool as they drank it.
6. Honeyduke's Homemade Ice Cream: (a.k.a. ice cream in a bag) - This one is always a hit. You take 1 cup of whole milk, 2 Tbsp. sugar, and 1 tsp. vanilla and put it in a quart-sized freezer bag and seal it with duct tape. Then you put 6 cups of ice and 6 Tbsp. ice cream salt into a gallon-sized freezer bag. Put the quart bag into the gallon bag and seal with duct tape again. Massage and gently shake the bag for 5 to 10 minutes or until ice cream forms. I had the tweens pair up and brought dish towels from home so that their hands didn't get too cold when shaking the bag. Then you can put the ice cream into cups and enjoy!
All in all, the program was a success. I had 30 very excited Harry Potter fans attend. The invisible ink activity did hold up the group and put a kink in the flow of the program, but the tweens didn't notice and got to take home a lot of neat potions at the end.
Subscribe to:
Posts (Atom)