Monday, April 18, 2016

Pizza and Pages: The Demon King by Cinda Williams Chima

Type of Book: Fantasy

Plot Summary: From Goodreads"Times are hard in the mountain city of Fellsmarch. Reformed thief Han Alister will do almost anything to eke out a living for his family. The only thing of value he has is something he can't sell—the thick silver cuffs he's worn since birth. They're clearly magicked—as he grows, they grow, and he's never been able to get them off.

One day, Han and his clan friend, Dancer, confront three young wizards setting fire to the sacred mountain of Hanalea. Han takes an amulet from Micah Bayar, son of the High Wizard, to keep him from using it against them. Soon Han learns that the amulet has an evil history—it once belonged to the Demon King, the wizard who nearly destroyed the world a millennium ago. With a magical piece that powerful at stake, Han knows that the Bayars will stop at nothing to get it back.

Meanwhile, Raisa ana'Marianna, princess heir of the Fells, has her own battles to fight. She's just returned to court after three years of freedom in the mountains—riding, hunting, and working the famous clan markets. Raisa wants to be more than an ornament in a glittering cage. She aspires to be like Hanalea—the legendary warrior queen who killed the Demon King and saved the world. But her mother has other plans for her...

The Seven Realms tremble when the lives of Hans and Raisa collide, fanning the flames of the smoldering war between clans and wizards."


Average Teen Rating: 5.78
The teens were so-so on this one. Some of the die-hard fantasy fans liked it, but my other readers thought that Han was a boring character and disliked his chapters, If you have a lot of fantasy fans in your book club, this is a good pick.


Discussion Questions: I had a hard time finding questions for this title, but the Choose to Read Ohio website has a nice toolkit.

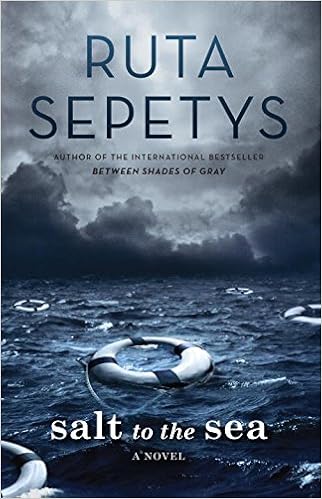
Pizza and Pages: Salt to the Sea by Ruta Sepetys

Type of Book: Historical

Plot Summary: From Goodreads: "Winter, 1945. Four teenagers. Four secrets.

Each one born of a different homeland; each one hunted, and haunted, by tragedy, lies…and war.

As thousands of desperate refugees flock to the coast in the midst of a Soviet advance, four paths converge, vying for passage aboard the Wilhelm Gustloff, a ship that promises safety and freedom.

Yet not all promises can be kept.

Inspired by the single greatest tragedy in maritime history, bestselling and award-winning author Ruta Sepetys (Between Shades of Gray) lifts the veil on a shockingly little-known casualty of World War II. An illuminating and life-affirming tale of heart and hope."


Average Teen Rating: 8.45
All but one of my teens loved this one. (And the one that didn't only read the first 2 chapters.) They thought it was fast-paced and interesting. We had a lot of great discussion around this one. Highly recommended.


Discussion Questions: I used the Penguin Discussion Guide and the Lit Lovers site.

Anime Club: Fuse Bead Art

It's that time of year for me where I am gung-ho about spring cleaning, which at work means clearing out my craft supplies!

I had purchased a huge tub of fuse beads (or Perler beads to some) for another program last year. In the midst of wracking my brain for easy anime club activities, it came to me: 8-bit art!

All I did was set out bowls of the fuse beads and the set of bead boards we had already purchased.


Then I explained to the teens that they could either look up a pattern online, or make up their own design. Kandipatterns or Perler Bead Patterns or even just Google are all good places to look.

As a teen finished their design, I had them bring it up to me to iron for them. I set my iron on med-high and used the ironing paper included with the beads. You could also use parchment paper. I ironed the first side really well by moving in a circular motion over the beads.

Here are some of the finished designs:


This activity was super easy and the teens seemed to really get into making elaborate designs.

The only things I would do differently: 

I had originally only set out 5 large bowls of beads for the teens to share, but it would have been better for me to give each one their own smaller individual bowl to use. Also, I would purchase a container of black only beads. This was the most coveted color bead as a lot of them wanted to outline their creations in black.

Saturday, March 26, 2016

Flannel Friday Roundup - 3.26.16


Happy Saturday, everyone!

First up is Wendy from Flannel Board Fun. She's a definite overachiever with five adorable flannels sets!: Town, Space, Flowers, Ocean, and Dinosaurs.

Emily at Literary Hoots shares her perfectly-timed flannel based on the book Chester's Colorful Eggs. She gives us other options on how to use the flannel too. It has the added bonus of helping children learn their colors!

Jane at Piper Loves the Library turns her lovely flannel from In My Nest into a lesson about nature. I love how she also details the rest of her program, which includes a neat nest art activity!

Spring is in the air for Kathryn over at Fun with Friends at Storytime! Her bee flannels have multiple uses and she's nice enough to include some song/fingerplay ideas to get us started with planning our storytimes.

Last but not least, Kate over at Felt Board Magic shares her fun take on "Five Monkeys and the Alligator" with Five Little Fish Swimming in the Sea. She includes the song lyrics and examples of the different fish she's made!

What a great variety in this week's roundup! I'm excited to try making some of these myself.

For more information about Flannel Friday, check out their official blogPinterest pageFacebook group, or follow #flannelfriday on Twitter.

Happy flanneling!

Thursday, March 24, 2016

Flannel Friday Placeholder


I don't know about you, but in Ohio it doesn't quite feel like spring yet:

Image source


Please comment below with a link to your flannels and your name by Friday at 10:00 p.m. and I'll post the roundup on Saturday.

For those of you who aren't familiar with Flannel Friday, check out their websiteFacebook group, or Pinterest page.

Happy flanneling!

Monday, March 14, 2016

Makey Makey Workshop

When searching for tech program ideas for tweens and teens, I found Makey Makey to be one of the easiest and most rewarding.

What is Makey Makey, you ask? It basically an invention kit that allows user to take regular objects that they'd find at home and connect them to the computer. The kit looks like this:

Source

You can buy a kit for around $50 on Amazon. We purchased 8 kits so that we could offer a workshop for up to 24 participants (having them work in groups of 2 or 3). I created a one-time, 1 hour workshop for grades 3 to 5 that you can alter for really any group ages 8 and up. Here's what I did:

1. Give a brief overview of electricity/circuits. Because using the Makey Makey is basically just making circuits and some kids might not have learned about them yet in school, I showed them a brief video from Bill Nye (or you can use his Electricity DVD which has the same short video)

2. Show some short videos of cool Makey Makey projects. First I showed them the introductory video from the Makey Makey website. Then I showed them some other cool projects from YouTube, such as the guy playing "O Say Can You See" by eating/drinking. I literally just Googled "cool Makey Makey projects" to find my examples.

3. Go over the parts of the Makey Makey. As I explained each part, I had the tweens follow along by connecting the various cables as well as the Makey Makey itself to the computer.

4. Give the tweens specific challenges to make sure they were all on the same page. I used the "How-To" page of the Makey Makey site for challenges:

  • Use the Makey Makey with the space bar key
  • Play the drum kit using the Makey Makey
You can give them more challenges before setting them loose if you want, but I found these to be the best two in order to get them comfortable using the kits. I briefly explained the more complicated connections on the back of the Makey Makey board in case they wanted to try its but told them that was completely optional.

5. Go over the various conductive materials available to use. We briefly talked about conductivity and the items I set out for the tweens to try out. These included:
  • bananas
  • celery/carrots
  • marshmallows
  • gummy bears
  • aluminum foil
  • quarters
  • pencils/paper
  • Play Doh


6. Let them tinker! I gave them free reign to try out the Makey Makey and came around to help with any questions/troubleshooting. The most popular items were the Play Doh, the marshmallows, the gummy candy, and the bananas. The pencil/paper drawing were hit and miss. The next time, I would practice using these materials beforehand. I also gave them some links to games that worked well with the Makey Makey controller:

Mario Bros. - https://scratch.mit.edu/projects/31583772/ 
Pac Man - https://scratch.mit.edu/projects/14608394/ 
Scratch Piano: https://scratch.mit.edu/projects/2543877/ 
Whack A Frog: https://scratch.mit.edu/projects/2543877/ 
Tetris: http://www.freetetris.org/game.php 
Full Pac Man: http://www.freepacman.org/welcome.php 
Pong (uses mouse): https://scratch.mit.edu/projects/10128515/ 
Pong (2 player): https://scratch.mit.edu/projects/49420956/

7. (Optional) Just before class ended, I had them create a circle holding hands and played the bongo game. This showed them that we could create a giant circuit using just ourselves!


That's it! I'm planning a workshop for teens where we get more involved with what the Makey Makey can do.

Have you ever done a Makey Makey program? What did you do?

Wednesday, March 9, 2016

Anime Club: Onigiri

Onigiri (or rice balls) is a popular Japanese dish. It's also pretty easy to make! So I decided to try it as an activity at my last anime club meeting.

I found this website, which details a great method for making onigiri using saran wrap.

What You Need:
  • Sushi rice (You must use sushi rice specifically. You can find it at your local Asian market or Amazon. See the website above for more info on the differences in rice.)
  • Salt
  • Water
  • Saran wrap
  • Small bowls, cups, or round containers (I found these, which ended up being the perfect size.)
  • Fillings such as tuna, chicken, pickles, etc. Really anything salty is good.
  • Nori

I made a big batch of rice in my rice cooker the day of the program. If you have an anime club and do several food programs with them, a rice cooker is a great investment!

(Please forgive the poor quality photos. I was taking them while the teens were watching anime with the lights down.)

1. First, put some Saran wrap in the bowl. Sprinkle some water, then salt in the bottom making sure to cover the sides too.


2. Then scoop some rice in the bottom. I measured out about 1/2 cup for each teen, which made a pretty good sized rice ball.


3. If you want to add a filling, poke a hole in the middle with your finger. If not, skip to Step 6.


4. Scoop a small amount of filling into the hole. For fillings, I provided canned tuna, teriyaki chicken, dill pickles, soy sauce, and bonito flakes for those that wanted a more traditional filling. The teriyaki chicken was by far the most popular choice with my teens.


5. Cover the hole with a small amount of rice.


6. Gather the ends of the Saran wrap and twist in order to get all of the air out.


7. Shape the rice using your hands into balls, or triangles, or whatever shape you like! Add a strip of nori seaweed to the bottom to make it easier to hold/eat.

I had some toasted sesame seeds left over from another program, so I set those out for the teens to add as a topping (right).

One of my teens was really good at making triangles. Me? Not so much...

That's it! These were so easy to make and the teens loved it. I highly recommend this for any anime club.


Have you made onigiri at your library? What other food programs worked for you?

ShareThis