Showing posts with label School-Age. Show all posts

Monday, August 19, 2019

Host a Supa Awesome Dog Man Party!

At my library (and I'm sure just about every other library out there) Dog Man is never on the shelves, so I decided to try my hand at hosting a Dog Man Party, with great results.

It was on a Saturday afternoon in the spring when the weather in Ohio isn't quite nice enough to be outside, but not awful enough to not want to venture out at all. It was geared for kids in grades K to 6, but I didn't turn anyone away. I ended up with over 100 attendees who came from all over the county!

Everything was self-directed, which freed me up to take photos, replenish supplies, and generally interact with the families.

Here's what I did:

Dog Man Comic Drawing
At this station I set out blank white paper, pencils, colored pencils, and blank comic templates and just let the kids draw. I copied Dav Pilkey's "How 2 Draws" from the back of the books and tried to have a copy of each Dog Man volume nearby. I also printed out his instructions on how to make a Flip-O-Rama, since those are in all of the books. This was one of the most popular stations. I had kids who spent the entire program drawing, which was awesome.


Pin the Head on Dog Man
I am lucky enough to have a maker space department in my library that was able to print out a big Dog Man body on vinyl (to make it reusable) and blow up some Dog Man heads to play the game with. 


Petey's Secret Lab
Since in the books Petey is always inventing things, and in one of them he makes a shrink ray, I busted out some leftover Shrinky Dink paper, Sharpies, and borrowed a couple of craft toaster ovens and let the kids make a Shrinky Dink. I ended up needing someone to man this station the entire time as it was really popular!


Lil' Petey's Robot Shop
Lil' Petey and 80 HD end up becoming good friends in the books, so I wanted the kids to be able to make their own 80 HD or other robot buddy. I literally put out random things that we already had in our craft cabinets and didn't give them any parameters on what to build. Here are some of the cool things they came up with:


One of my favorite things to do at programs is to set out random items and then observe what kids create with them. As always, they exceeded my expectations.

Flippy's Evil Fishing
I had purchased a simple plastic fishing set to use in programming. I took one of the fish (see the middle of the bin next to the egg-looking thing) and made it look like Flippy using Sharpie marker.


Take Down the Evil Weenies!
We had a plastic bowling set already, so I just used packing tape to attach photos of the evil weenies and kids could try to see if they could bowl them all down.


Save the Town!
I use this idea a lot in storytimes with younger kids and it was a hit here too. I just took some LEGO minifigures and other random plastic people/animals and froze them in ice cube trays and plastic containers of water. Then kids could use metal spoons to try to break them out of the ice in order to rescue them.


Superhero Creator
In the books, Dog Man and his friends come up with superhero names for themselves, so I wanted the kids to be able to do the same. I set out paper masks and string for them to decorate as well as a Superhero Name Generator and sticky nametags to show off their new persona.


That's it! I didn't spend any money on this program and would do it again in a heartbeat. Have you done a Dog Man program? What activities did you do?

Wednesday, July 1, 2015

It's a Soup-er Garden!

Every summer, I host a container garden program on our library's patio. This summer, since our theme for the reading program is superheroes, why not have a soup garden?

I ran the program similarly to the Butterfly Garden program last year where we had different activity stations:

1. Container Planting: I had enough plants/seeds on hand for each child to get to plant at least one. For the soup garden, we planted:

  • Tomatoes - Roma, Red Grape, and Yellow Pear
  • Peppers - Green and Yellow
  • Nantz Carrots (seeds)
  • Zucchini
  • Broccoli
  • Burpless Cucumbers (seeds)
  • Blue Lake Green Beans
  • Onions - White and Yellow'
  • Spinach (seeds)
  • Basil
  • Thyme
  • Oregano


2. Rock Painting: Originally, I found this craft and desperately wanted to do it. But after reading the list of chemicals in ready-mix mortar and stepping stone mix (which are quite scary!) and after agonizing over other possible alternatives, I just decided to just let participants paint rocks that they could either take home or leave behind to decorate our library garden. I set a tarp down on the ground, filled some egg cartons with paint, and left the rest up to their imaginations!


3. Bagel Bird Feeders: All you need for this craft are some plain bagels, ribbon, birdseed, and Sunflower Seed Spread (which is safe for both birds and peanut butter allergies).


4. Plant Pals: Kids take a clear cup and decorate it with stickers or markers, add some potting soil, and sprinkle some grass seed on top. I found the stickers on Oriental Trading (nose and mouth stickers found here).


5. Snack/Story: As the families finished up with all of the activity stations, they could come over a get a snack. I provided grape tomatoes, baby carrots, celery sticks, and cucumber slices with ranch dip. (Note: the celery sticks were by far the least popular choice.) We also had cold glasses of water to drink. When the majority of them were having the snack, I read a story or two.

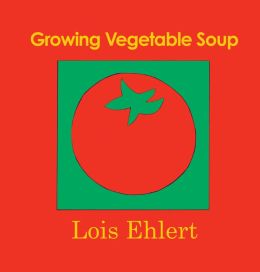
Here are some great choices when you need a vegetable-themed story:


In August, the plan is to have a harvest day where families can take home some vegetables after we enjoy some gazpacho. 

For more garden ideas, check out my gardening Pinterest board. Happy gardening!

Tuesday, June 16, 2015

Display Space on the ALSC Blog

Today I'm over at the ALSC Blog talking about our awesome display case/space for kids. Check it out!

Saturday, April 11, 2015

Flannel Friday Roundup: 4.10.15


Thanks to everyone who sent in their flannels! Here are this week's lovely submissions:

Lisa at Libraryland starts us off with a sure-fire hit: a "We're Going on a Bear Hunt" flannel. She also includes a link to the template, which is always awesome.

Next, Kathryn at Fun with Friends at Storytime shares a Mushroom Hiding Game inspired by one of her favorite childhood books. She includes wonderfully detailed instructions on how she made her flannel, but honestly she really had me at "sequins" and "glitter glue".

Katie at Storytime Katie shares a fun and clever take on "B-I-N-G-O" with one of my absolute favorite foods: pizza. I love that she put the letters on the pizza slices themselves.

Nikki at heytherelibrary gives us a blast from her not-to-distant past with her very first flannel set, "The Three Billy Goats Gruff". This one's a classic that would work for just about any age.

Library Danielle shares a cute "Little Bird" flannel game that teaches kids about colors. Her post also includes a toddler storytime plan all about the color red as a bonus.

Mel at Mel's Desk takes her great train flannel and puts a new song to it called "This Little Train". She not only includes her template, but also links to other song/rhyme ideas to use with it. This flannel should be a staple in everyone's arsenal for its sheer versatility!

Lastly, Lauren over at The Dilley Dally shares her "B-I-N-G-O" flannel complete with an adorable dog to go with the letters. As part of her storytime, she also gave each child a condensed flannel version of "Dog's Colorful Day" by Emma Dodd to retell the story at home. What a great idea!


For more information about Flannel Friday, check out their official blogPinterest pageFacebook group, or follow #flannelfriday on Twitter.

Happy flanneling!

Wednesday, December 31, 2014

Elf Academy

Every season, my library has hosted some sort of holiday program. For the past few years, we've done a Polar Express program. This year, I decided to try to switch things up and host an Elf Academy. The basic idea is that the kids would complete various elf-themed crafts in order to become Santa's official elves. It was a huge hit! Here's the rundown:

Ages: We opened the program to all ages.

Days/Times: We offered 3 different sessions on consecutive evenings at 7:00 p.m. The program lasted about an hour.

Staff Needed: Me plus another staff member. I also had 2 teen volunteers each night.

Program Outline:

As the families arrived, I had them complete 4 different "Elf Activities". This took about 30 minutes for the majority of the kids to finish all of the crafts.

Elf Activity #1: Elf Hats


You Need:

  • Red poster board headbands
  • Green construction paper triangle "hats"
  • Elf ears (cut out from manila file folders)
  • Pom poms
  • Markers
  • Glue sticks
  • Staplers

All the kids do for this is glue the pom pom to the triangle, the triangle to the headband, and then staple the band to fit the child's head. I let the kids decorate their hats with the markers. I asked them to put their name on the front of the band (so that Santa would know their name).

Elf Activity #2: Reindeer Food

You Need:
  • Rolled oats
  • Birdseed
  • Decorator crystal sprinkles
  • Sandwich baggies
  • The reindeer poem printed on cardstock

Each child takes a baggie and adds a scoop of each ingredient. Place a copy of the poem in the bag at the end and close it up. Easy peasy!

Elf Activity #3: Ornament Creation

I just purchased ornament kits from Oriental Trading. I went with scratch art ornaments this year.


Elf Activity #4: Jingle Bell Bracelets

You Need:
  • Pipe cleaners
  • Jingle bells

Each child took 3 bells and strung them on the pipe cleaner. Then they wrapped it around their wrist and tucked in the ends.


As the kids finished the activities, I had them gather on the other half of the room on the floor, where I read a story. I chose Shhh! by Julie Sykes, which is one of my favorite Santa stories. It's interactive in that you can have the kids say "Shhh" at the right times in the story.


After that, my staff partner sang a fun song with the kids using their bells. 

Ring the Jingle Bells
(Tune: She'll Be Comin' Round the Mountain)

We will ring those jingle bells so loud and clear
We will hear the dingle, dingle
When they jingle, jingle, jingle
We will ring those jingle bells so loud and clear


We will ring those jingle bells so quietly
We will hear the dingle, dingle
When they jingle, jingle, jingle
We will ring those jingle bells quietly

We will ring those jingle bells so fast and loud
We will hear the dingle, dingle
When they jingle, jingle, jingle
We will ring those jingle bells so fast and loud

Then, one of us said something to the effect of "You know...I wonder if something magical will happen if we all shake our bells at the same time together." That ended up being Santa's cue to come out!

We have a fabulous volunteer who dresses up as Santa for us every year. We set out an armchair for him in the corner of the room to sit in while he talks with the kids.

After Santa's comes out, I announce that I'll be splitting the group in half according to last name. Half of the group will visit with Santa and half will decorate sugar cookies and have some hot cocoa. Then they'll switch over to the other group as they finish. Hopefully, this way the kids/parents won't get restless waiting for Santa.

Group #1: Santa
Santa sits in the armchair and greets each child. They can visit for a moment and tell him what they want for Christmas. The parents can take photos and Santa hands off a diploma and mini candy cane to each child for finishing Elf School. My coworker had a clipboard with the certificates and wrote each child's first name in marker as they visited Santa.


Group #2: Cookies and Hot Cocoa

While I read Shhh!, I had the teen volunteers clear off 2 of the craft stations and set up the icing and sprinkles. Before the program began, we had set each sugar cookie on a paper plate and had them on our kitchen counter. This way, kids could take a cookie and then go over to the tables to decorate them. We also had big carafes of hot cocoa. I had 4 carafes each night, which was a good amount for the 100+ people I had at the program.


What I Learned:


  • Originally, I allowed a maximum of 50 children for each session. Because it was so popular, I opened it up to 60 total instead. This ended up being too many people, even though we held the program in our large meeting room. Next year, I would stand firm on 50 and maybe open a 4th session instead.


  • I purchased red and green icing and sprinkles because I was thinking it would be festive, but I had some comments about concerns with the dye in the icing. So next year, I would probably also offer plain white icing.

You can click here to see more photos of the program on our library department's Facebook page!

Saturday, May 31, 2014

Butterfly Gardening @ the Library

At my library, we have a beautiful patio area with tables and chairs and nice wooden benches to relax on. We also have an open area that's perfect for container gardening. I love doing any sort of programming that gets kids outside and experiencing nature, thus my annual gardening program was born. It began two years ago with a Pizza Gardening program. We planted tomatoes, peppers, onions, and herbs and at the end of the summer, we harvested our vegetables and had an English muffin pizza party!

Last year, we had a potato garden where we grew them in large burlap sacks and then had a French fry party in August.

So this year, my idea was to host a butterfly and bird garden. In conjunction with the garden itself, we could also grow butterflies. Today was our planting day and it was a big success. Here's what you need to run a similar program at your library:

1. Plants that attract birds and butterflies. Long before the actual shopping trip, I did some research into what types of flowers attract butterflies and birds. I learned that you need 2 different types of plants: host and nectar plants.

Nectar Plants: These attract both butterflies and hummingbirds. Some examples are butterfly weed, zinnias, marigolds, verbena, and impatiens.

Host Plants: These are plants that butterflies tend to eat and sometimes lay their eggs on. Some examples are milkweed, dill, parsley, and oregano.

Most of the books that I read recommended grouping your flowers by color. They also suggest creating different flower heights for perching on. Thus, we purchased some shepherd's hooks for some hanging baskets of flowers.

For the planters themselves, I put out a call for coworkers to donate their extra plant pots for our garden and ended up getting more than I needed!


2. A hummingbird feeder. You can find expensive or cheap ones at a garden center. Or, if you're feeling crafty, you can make one of your own! Then you just make some nectar using a recipe like this one.

3. Some places for the butterflies to sun. I purchased a plant saucer and filled the bottom with small, flat rocks. Then I filled it up a bit with water. This way, the butterflies can perch there to sun and also get some water if they like. One of the kids during planting day commented that maybe the butterflies could take a bath there and clean their wings if they got dirty! I also brought in some larger flat rocks for butterflies to sun on as well.

4. Butterflies to grow! We are also growing butterflies inside the library with the intention to have a butterfly release party when they are all grown. There are a couple of places to purchase the caterpillars/habitats:


One thing to be aware of is the delivery of the caterpillars. With some kits, they will send you the habitat and a certificate to send it to get the caterpillars when you are ready, which takes extra time. Others will send you the caterpillars along with the habitat. So make sure to plan ahead to fit your time frame.


5. A planting day. For the actual planting day, the program was open to all ages and took about an hour to get through everything. I decided to have several different activities for the families to do. Because I wasn't sure how many families would attend, my plan was flexible enough that we could either all go from activity to activity together. Or I could split them up into groups and rotate them every 15 minutes. Also, note that I did this program with another staff member, which made everything run much easier.

As the families arrived, I had them gather on the benches. I made introductions and explained what we would be doing. I showed off our caterpillars and we went over their life cycle together. Then we got started planting the flowers. Each child got to plant at least one flower in the pots with the assistance of me, my coworker, or a parent.

Next, we gathered at a table to make coffee filter butterflies. All you need are coffee filters, clothespins, markers, and pipe cleaner for antennae.


Then we made bird feeders with pipe cleaners, Multi-Grain Cheerios, and ribbon. Super easy and fun!


Last, I gathered the kids together for the last 15 minutes to have a snack (butterfly shaped crackers, string cheese, and apple juice) and read The Very Hungry Caterpillar (of course).


Here are some websites that you might find helpful:


Here are some books you might find helpful:


What gardening programs have you done at your library?

Monday, February 3, 2014

Namaste: Yoga Storytime

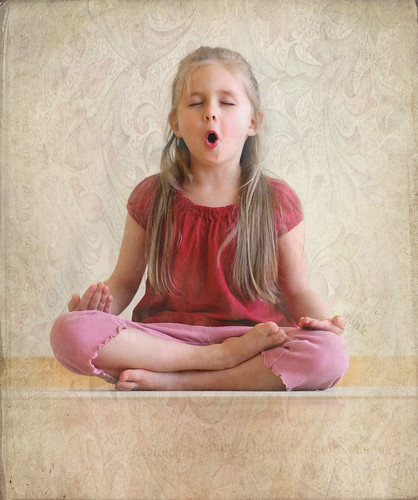
Photo by papermoons
I've been seeing several inquiries around the web lately about Yoga storytime. I decided to share my outline that I created last spring. I held three 30 minute sessions over the course of 1 day. The first two sessions were geared toward ages 4 to 5 and the last session was geared toward ages 6 to 7. My co-worker presented this with me. It worked out nicely because one of us could lead the class and demonstrate the poses, while the other person could walk around and help the kids with their poses.

Now I semi-regularly take yoga at a studio so most of these poses and the format were pretty familiar to me. However, even if you haven't done a yoga pose in your entire life, you can still lead this program! The books YogaKids by Marsha Wenig, Yoga Games for Children by Danielle Bersma, and Storytime Yoga by Sydney Solis are all great resources.

Note: You can format/change up this program any way you like. This is just what I did and what worked for me!

Yoga Storytime Outline
(Play Yoga:II CD in the background)


·         Welcome – Talk about why we do yoga: to help relax, to help us grow stronger, to help us become more flexible, and to help us think better (better breathing = more oxygen to brain = better thinking); talk about the word Namaste (Sanskrit for “I see and honor the light within you.” It’s a good way to greet or say goodbye to someone in yoga class.)

·         Namaste w/ clapping – Say each child’s name twice w/ clap and tap, then put hands at heart center and bow and say “Namaste” (Remind the kids that it’s okay to fall or to not be able to do something – just quietly try again)

·         Warm-Up – Sit up tall (zip your zipper/happy body sad body)
  •  Neck: look left/right; up/down; side to side; rotate
  •  Shoulders: lift up and down (breathe in and out); then around
  • Legs: Apple butter rub-spread on legs and reach to toes  
  • Hands and Feet: Wave hello

·         Kneeling Poses
  • Cat/cow (meow and moo/breathe in and out)
  • Downward Facing Dog – wag tail; hold up each leg; bark!
  • Cobra – wiggle and hiss
  • End up in down dog

·         Standing and Balancing
  • Walk both hands to frog crouch; tickle toes; then up over head to tickle ceiling
  • Straighten keens to bend over to touch your toes; hang like a rag doll
  • Stretch up to the sun; arch back; reach to pick apples; make a rainbow in the air with arms - end in Mountain pose
  • Tree pose

·         Yoga Game – Animal Charades (4’s & 5’s); Pass the object (we used a red gym ball) with feet (6’s & 7’s)

·         Book You Are a Lion! by Taeeun Yoo


· 

·         Quiet Time (w/ CD “Yoga Zone” Track #1 or #2) 
  • Have the children lay flat on their backs with their eyes closes
  • Turn out lights and play music
  • Read pg. 108 from YogaKids by Marsha Wenig
  • After the kids sit back up, roll a ball to each child and say "Namaste" then they roll it back to you and say the same

·         Closing Affirmation
  •  Stay seated with hands in heart position

I am smart (touch folded hands to forehead)
I am loved (touch hands to heart position)
I am wonderful (arms open up wide)

ShareThis